How to Set Up S/MIME on iPhone
A step-by-step guide to installing a S/MIME certificate and setting up S/MIME on your iPhone.
What is S/MIME?
The Secure/Multipurpose Internet Mail Extensions (S/MIME) is an internet standard that allows the sender of an email to protect the confidentiality of the message by encrypting its content with the public key contained in the recipient's S/MIME certificate.
The Mail app on the recipient's iPhone can then decrypt the message with the private key installed on their device. S/MIME is supported natively by iOS and Apple's Mail app.
S/MIME allows end-to-end encryption: the sender encrypts the email in a way that it can only be decrypted in the recipient's inbox, ensuring only the intended person can read it.
The sender of a message usually also signs it with their own S/MIME certificate (private key), which allows the recipient to authenticate the sender.
Get a S/MIME Certificate
You can buy a S/MIME certificate from a Certificate Authority (CA) or through a retailer, or get one free of charge from Actalis, an Italian CA.
Certificate authorities provide S/MIME certificate bundles either as a PKCS #12 file (.p12 or .pfx) if they generated the certificate for you or as a PKCS #7 (.p7b) file if you created the private key on your own computer and submitted a Certificate Signing Request (CSR) to the CA.
Transfer the S/MIME Certificate to Your iPhone
Transfer the certificate bundle to your iPhone, for example with iCloud or Airdrop. If you got the S/MIME certificate as a .p12 or .pfx file, the private key should be encrypted with a password, so it is usually considered safe to send the certificate bundle by email.
Install the Certificate on iOS
The instructions provided here were tested with iOS 14.4. If you find that they don't work with later versions of iOS, please let us know.
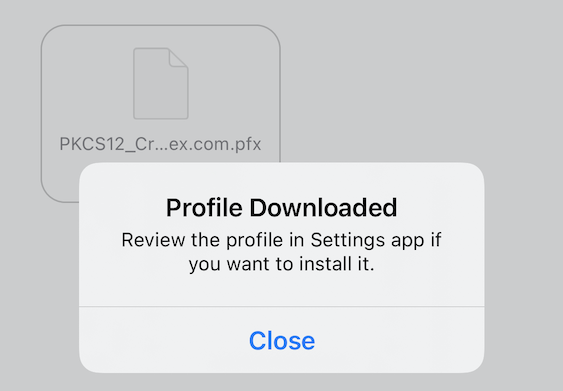
Open the certificate file. iOS should confirm the (identity) profile was downloaded, as illustrated above.
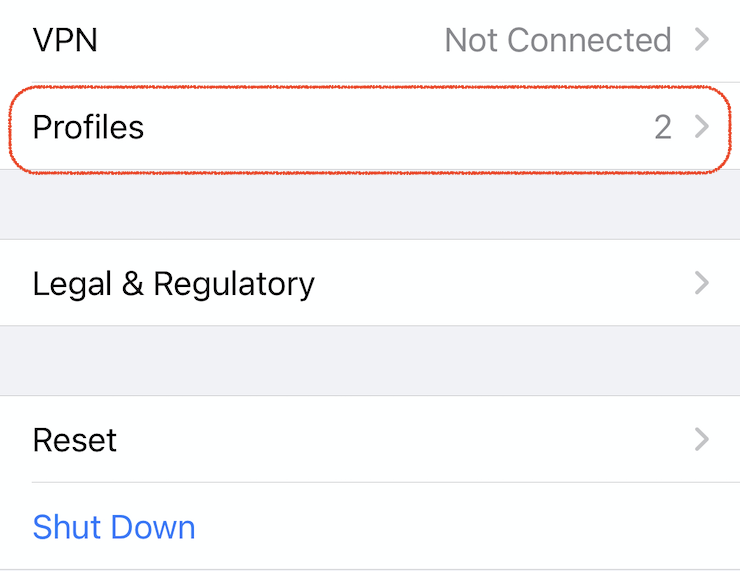
Navigate to the Settings app, select General and scroll down to the bottom. Tap Profiles, as shown on the screenshot above.
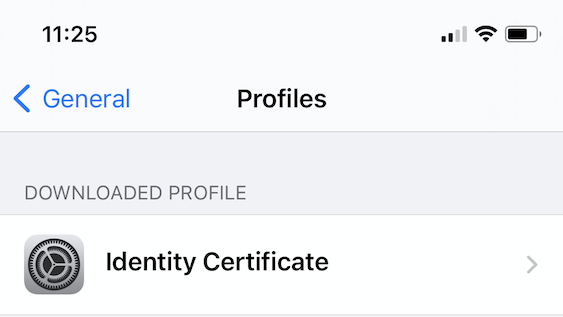
Select Identity Certificate.
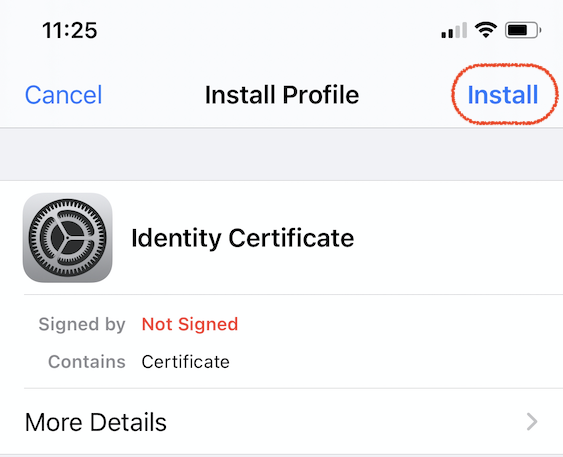
Tap Install. Enter your iPhone passcode when asked.
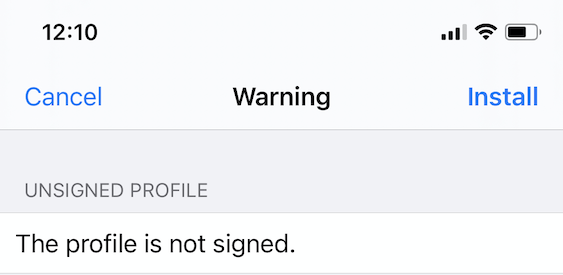
iOS may warn you that the identity profile is no signed. Do not proceed if you were unexpectedly asked by someone to install a certificate they provided.
As long as you know the origin of the S/MIME certificate bundle, tap Install again to confirm.
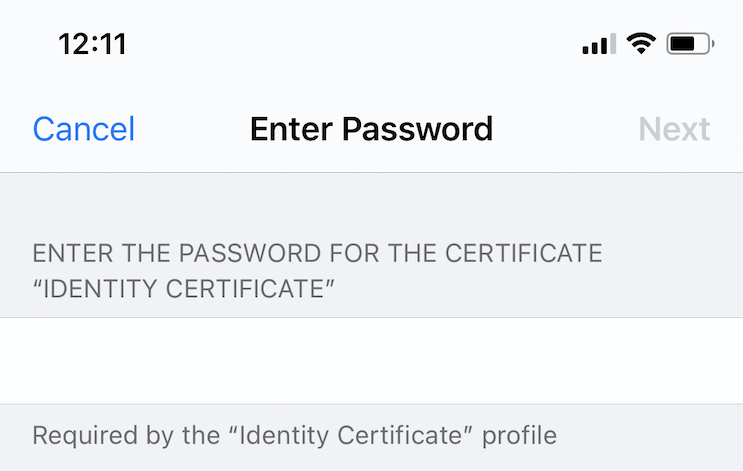
Enter the password associated with the S/MIME certificate bundle. If you obtained the certificate as a .p12 or .pfx bundle from a certificate authority, they must have also given you the password.
The certificate's private key was encrypted with the password, so if you lost it, you won't be able to import the certificate to iOS.
Turn On S/MIME Signing and Encryption
We're now going to set up the iPhone's Mail app to digitally sign outgoing mail with the new S/MIME identity. This will allow our email contacts with a S/MIME-compatible email software to:
- Authenticate messages we send them
- Automatically import our public key so they can use it in the future to send us encrypted emails.
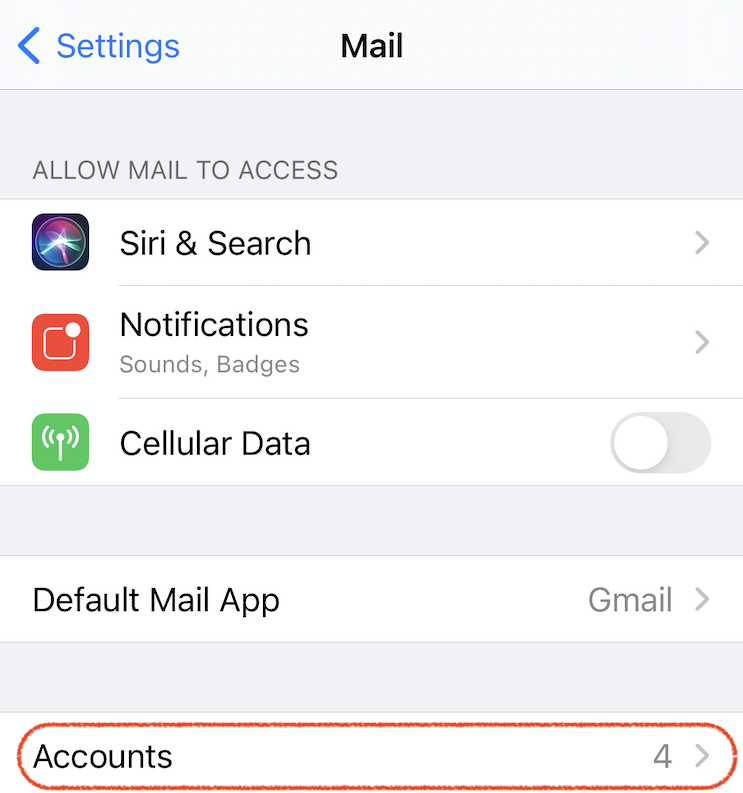
Go to the Settings app, locate Mail and tap Accounts. If you have installed multiple email accounts on the device, select the one corresponding to the S/MIME certificate.
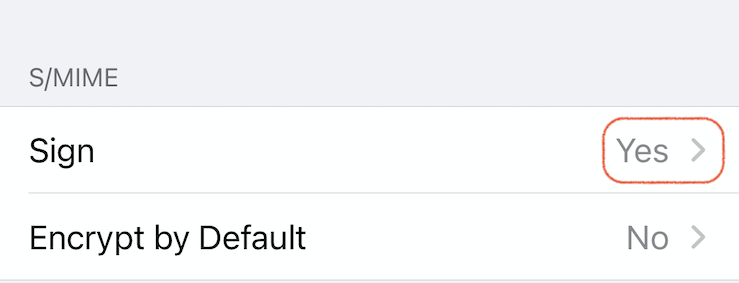
Tap Advanced and enable Sign (and if needed Encrypt by Default) in the S/MIME settings.
Add the Certificate to FormSmarts
Before you can receive online form submissions by encrypted email, you need to add the certificate to FormSmarts. Sign in from your iPhone (or any device where you've installed the certificate) and create a Certificate Addition Request (Step #4 in the set up instructions).
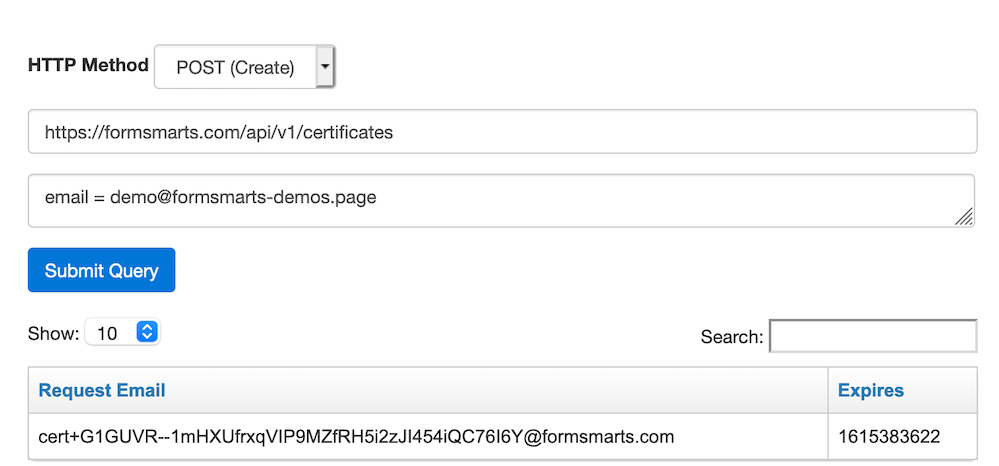
Send a signed email to the long email address returned when you submitted the request. You should receive an email within seconds confirming FormSmarts imported your S/MIME certificate successfully.