Archive for July, 2009
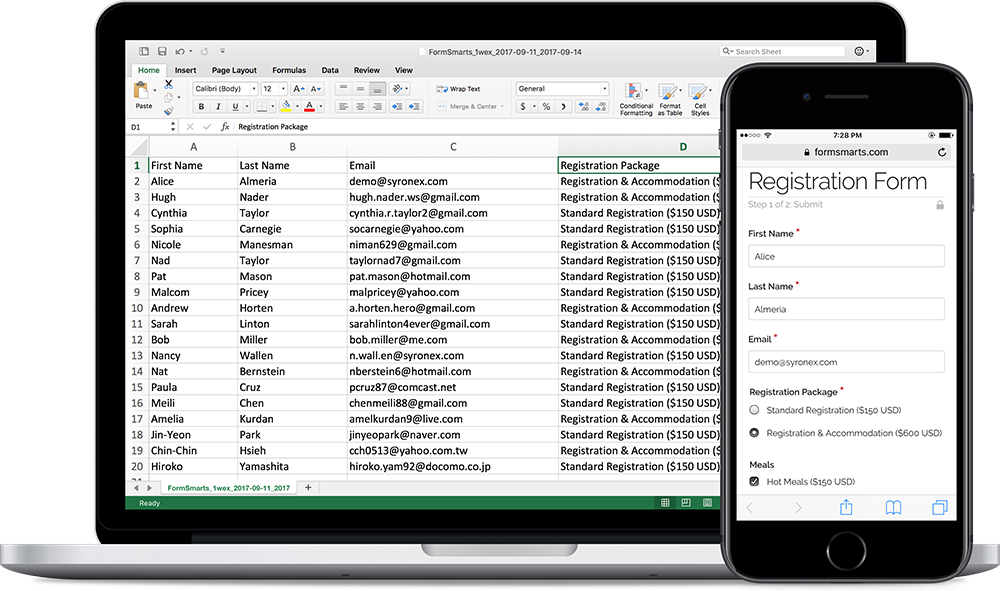
How to Export an Online Form to Excel
FormSmarts allows customers to collect online form responses on the cloud and export them to Excel. We also support a number of options to create custom reports.
Enable Form Data Storage for Export to Excel
Export to Excel requires that you turn on data storage for each of the forms for which you would like to use this feature.
For privacy reasons, form submissions were not saved on the cloud by default in the past. For Business accounts created after March 20, 2017, storage is now enabled by default. This does not apply to Pro accounts, for which storage is turned off by default and must be enabled for each form if needed. Note that the storage space available with Pro accounts is limited.
To enable stored form results and allow Excel reporting, visit the Submit Actions tab of the Form Details screen of each of the forms for which you would like to access form responses online, as shown in the video below.

You will then be able to download Excel reports from stored form responses in a few clicks with the report generator. Business-level members may also view individual form responses online and download a PDF Report.
To enable storage of form entries by default when you create a new form, check Turn on cloud storage for all new forms in the Settings Tab of the form builder. This option is only available in Business accounts and is turned on by default for accounts created after March 20, 2017.
This video shows how to set up a form to store form responses on the cloud for online access and export to Excel. Although it features an old version of FormSmarts, the information provided can still be used with the current version.
Updating Form Results
To ensure you get consistent and up-to-date data when you export form results as an Excel spreadsheet:
- If you find out a form response has incorrect or out-of-date information, edit it and amend the data
- After you submit a test run, remember to remove it.
Excel Report Generator Settings
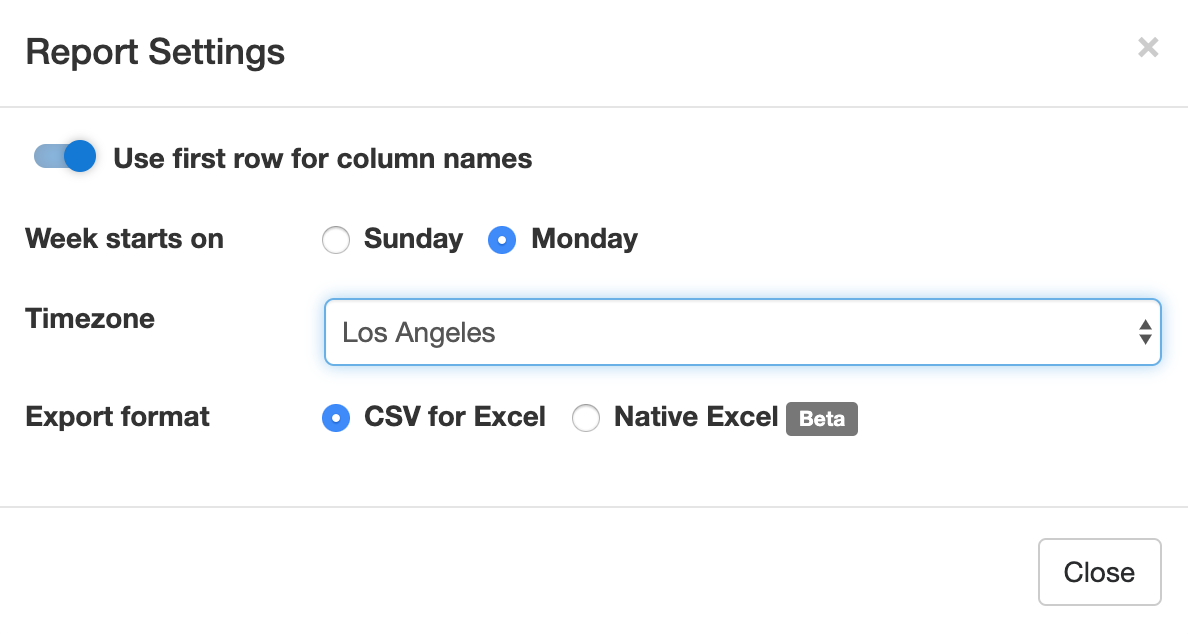
Show Field Names in the First Row
When toggled on, the first row of Excel spreadsheets shows the name of each field. This option is enabled by default.
Week Starts
The report generator allows you to specify the date range over which a report is generated by either picking a start & end date or choosing a preset period of time (This Week, Last Seven Days,…). For time periods that depend on the first day of the week (This Week, Last Week), we use the default first day of the week for your country (as set in your account). You can change the first day of the week with the Week Starts setting.
Select the Fields (Columns) Shown in the Spreadsheet

By default, Excel reports include:
- A column for each fields of a form
- Two columns for common metadata: the reference number of the form submission or a link to access it online, and the date and time the form was submitted
- Additional columns for payment details (payment forms only) and any context information passed to the form when it was submitted.
You can also create custom reports that only include the fields you need in the spreadsheet. To choose the fields/columns to include/exclude, check/uncheck the fields and metadata items listed in the Fields section of the Settings.
Time Zone
Preset time periods, date ranges and the form submission timestamp shown in Excel reports are now using your time zone (as defined in your computer settings). If you would like to generate a report using a different timezone, select the relevant city in the Timezone drop-down list. Note that the city selected by default may not be your city of residence, but it should be a city with the same UTC offset.
Filter Form Responses by Tags

If you have tagged form responses or a form has system tags set by FormSmarts when the form is submitted, you can create reports than only include form submission with the combination of tags and system tags you have specified.
You can for example create a report with all guests who registered and turned up at an event with the checked-in system tag. This tag is added when the event organizer checks-in attendees with the QR code in the confirmation email or PDF receipt.
Spreadsheet Format: CSV or XLSX
Choose a spreadsheet format from Comma-Separated Values (CSV) or native Excel (XLSX) format. We recommend you use the default CSV unless:
- Form submissions have data in a non-Western European language which doesn’t show correctly when you open the CSV spreadsheet
- Some of the characters like typographic curly quotes (‘, ’, “, ”) don’t display properly when you open the file with Microsoft Excel
If you experience one of these issues, download the report in Excel XLSX format. You can alternatively change the CSV text import settings in Excel as explained in the next section, or open the spreadsheet with another application like OpenOffice or Apple Numbers (on Mac OS X).
Importing an Excel Report When the Spreadsheet Contains Non-Western European Characters
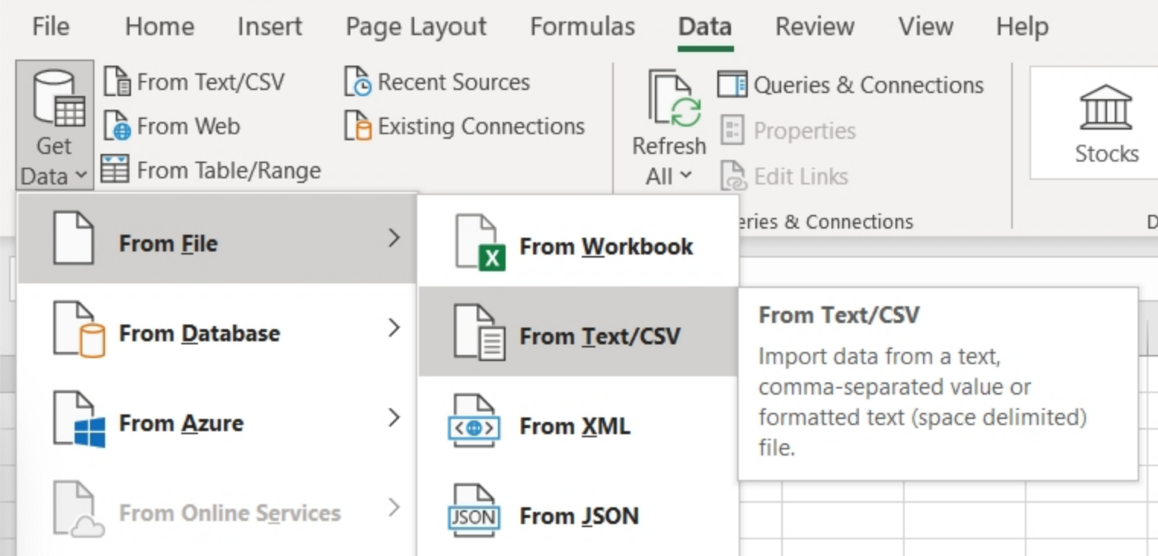
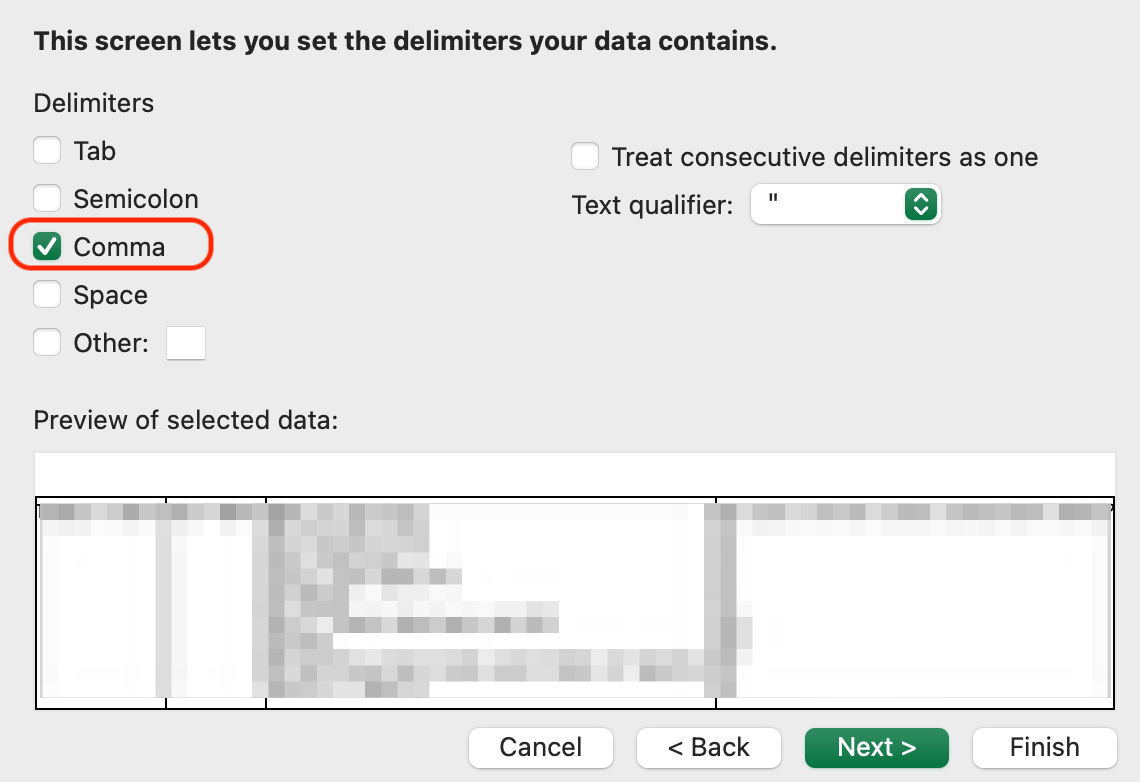
If an Excel (CSV) report contains text in a language other than English, you may need to change the character encoding to Unicode (UTF-8) in Excel’s Text Import Wizard, as illustrated below. The report may not display correctly for languages other than English unless the encoding is set to Unicode (UTF-8).
In the Data menu, click Get Data > From File > From Text/CSV
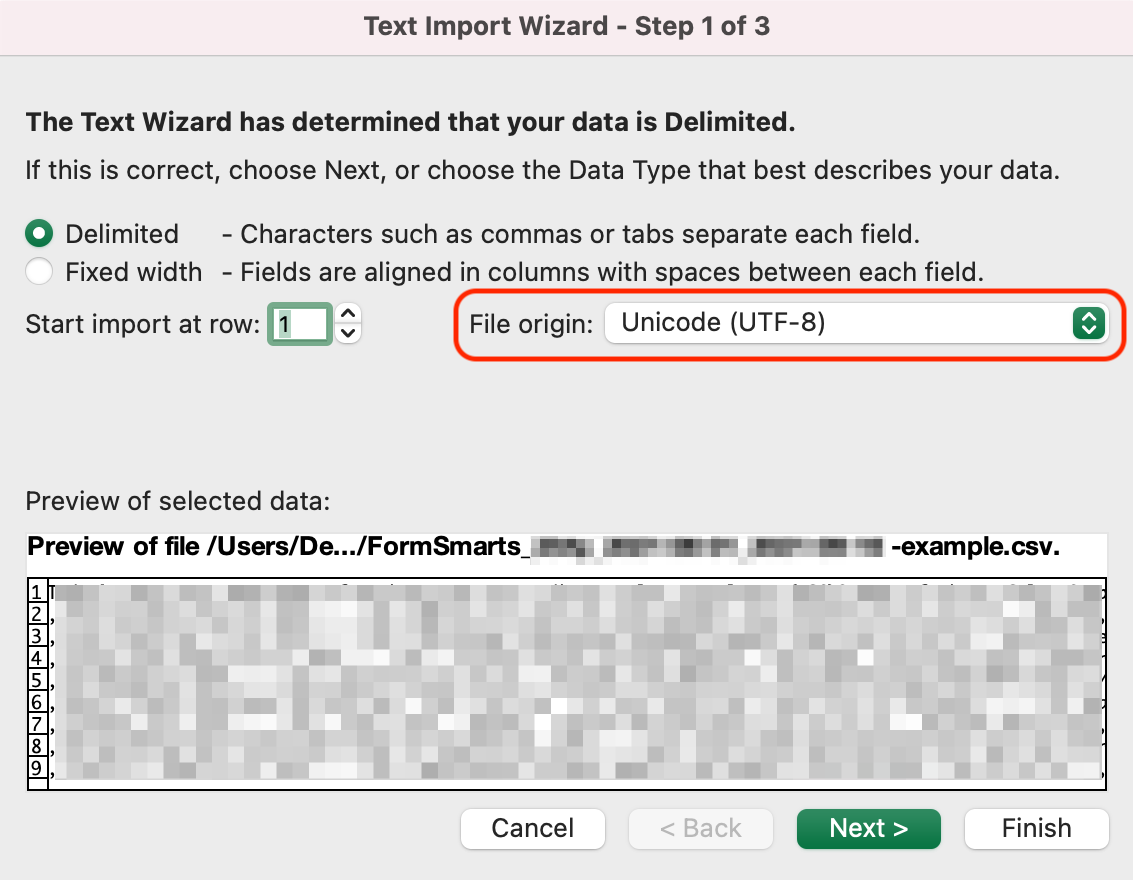
In Step 1 of the Text Import Wizard, set the file origin (character encoding) to Unicode (UTF-8):
In Step 2 of the Text Import Wizard, set the delimiter to Comma:
Posted on Jul 8th, 2009 in form builder.
17 Comments
Tags: excel, form results, form to excel, form to pdf