Archive for April, 2011
PayPal Integration in Two Steps
FormSmarts PayPal integration is as easy to use as our popular PayPal form feature, but it provides several additional benefits, mainly:
- FormSmarts only notifies you of a new registration (or more generally, payment form submission) after the payment is confirmed and verified (no need for manual verification)
- Your customer receives an automated email receipt with a copy of the data submitted and a payment confirmation. For registration forms, this can work as an e-ticket.
- PayPal Integration works seamlessly with other FormSmarts features (export to Excel, PDF reports, API).
What Are the Benefits of PayPal Integration?
FormSmarts’ old PayPal integration was easy to use and set up as it required no change to your PayPal account. A downside to this was that FormSmarts had no way to know if the payment went through or not, and you — the seller — had to manually reconcile payments and the corresponding form responses using the FormSmarts Reference Number. That was usually not an issue for small sales volumes, but could quickly become so as sales increased. We’ve now fully automated payment processing and integrated it with the form processing platform. Here are the benefits:
- No need to manually reconcile form responses with payment notifications from PayPal
- The seller is only notified of a registration/order when the payment has gone through
- The transaction won’t appear in Excel exports until the buyer has paid
- FormSmarts verifies that the payment details match data submitted on the form (e.g. amounts, quantities)
- Excel exports combine data submitted through the form and details of the corresponding payments.
- FormSmarts sends a confirmation email to the buyer with both the order details and a payment confirmation. If you have verified your website and uploaded a logo, your site URL and logo will appear in the email.
- Payment processing is fully automated and if you’re using online/PDF reporting or export to Excel, your registration forms are on autopilot.
- You can further automate processing or integrate FormSmarts with your website or another web service using the FormSmarts API.
Setting Up PayPal Integration
This video shows how to set up your form and set up your PayPal account for PayPal Integration.
Add Fees to the Form & Set It Up to Integrate with PayPal
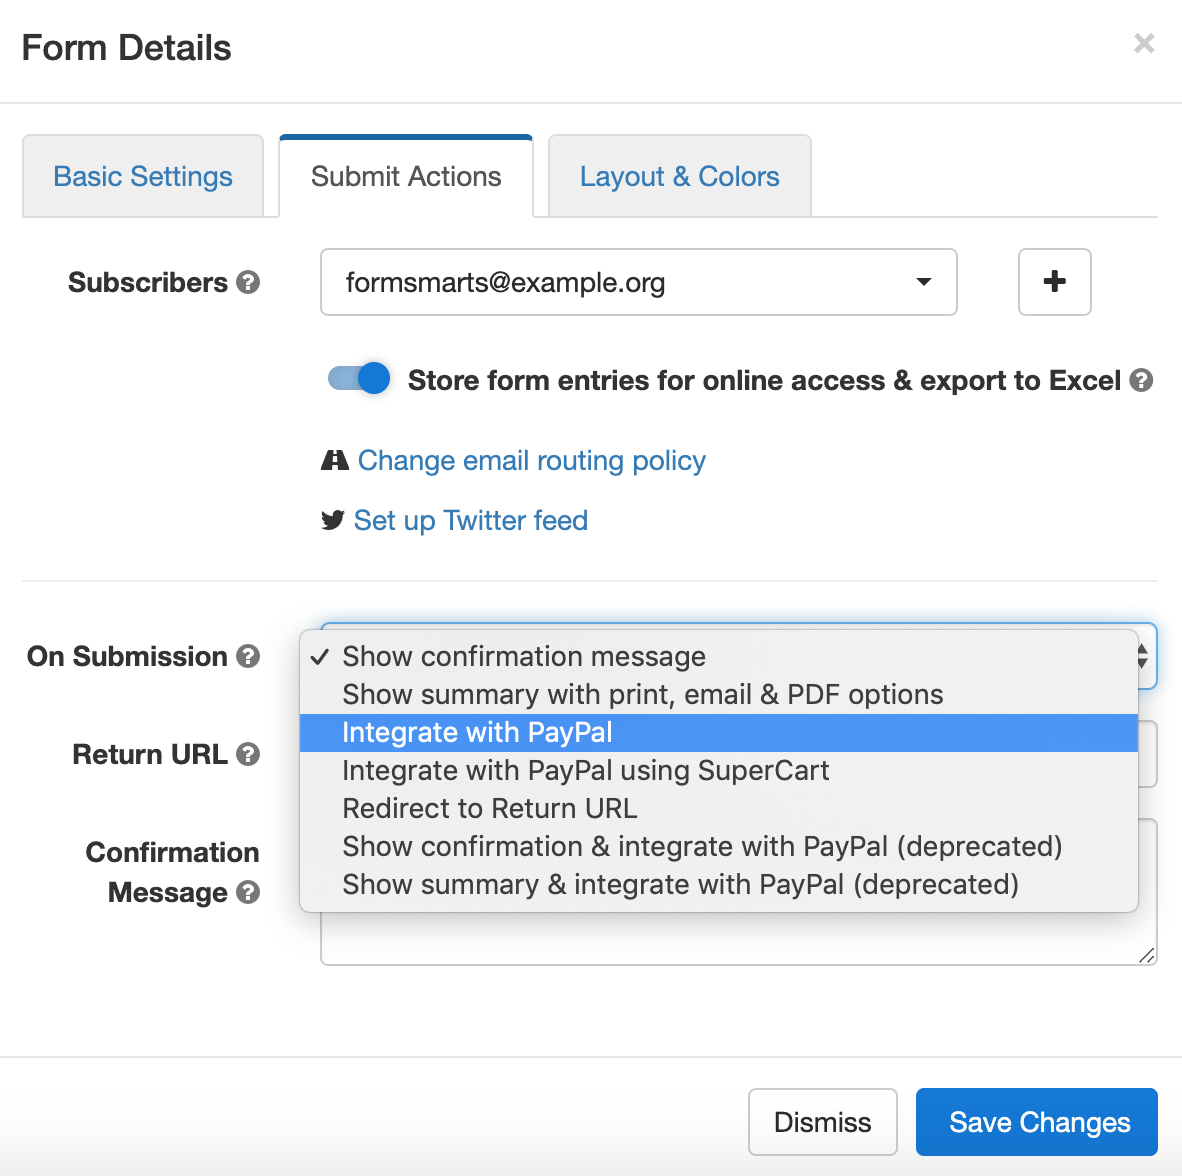
To set up PayPal integration, first create a payment form with prices formatted as shown in the PayPal integration page of the site. Then visit the Forms tab of the form builder and select Integrate with PayPal in the Submit Actions tab of the Form Details screen, as illustrated below.

Add Your FormSmarts Notification URL to PayPal
It’s now time to log in to your PayPal account to add your Notification URL. PayPal will use this URL to communicate with FormSmarts. You’ll find your notification URL in the Security Settings section of your FormSmarts account. The URL contains your private security key, so don’t share it with anyone.
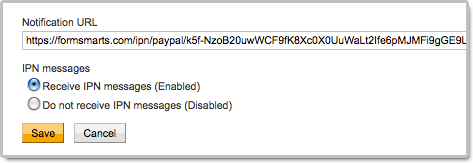
Use this link to access the Instant Payment Notification (IPN) page of your PayPal account, then tap Edit Settings and paste your Notification URL in the box as shown on the screenshot below. Make sure Receive IPN messages is enabled before saving.

You can alternatively navigate to the IPN Settings screen from the homepage of your PayPal account.
Payment integration will not work until you have added your FormSmarts Notification URL to your PayPal account.
Did You Link Multiple Emails to PayPal?
If you’ve associated more than one email address to your PayPal account, the email you’ve selected as your Primary PayPal email must be the same as your FormSmarts login email.
You can either change your FormSmarts login or update your Primary PayPal email so both email addresses are the same.
FormSmarts will reject payments associated with an email address other than your FormSmarts login email for security reasons.
If PayPal shows an error on the checkout page when testing your first form, you may need to update your PayPal account settings.
Posted on Apr 28th, 2011 in payment form.
27 Comments
Tags: form builder, payment integration, paypal, paypal form
A Tip to Increase Form Conversion: Use Required Fields Wisely
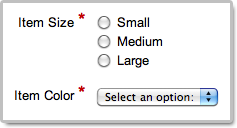
When creating a form, the form builder allows you to specify whether your want each input field to be required or optional. The meaning of required is obvious: form users will not be able to submit the form unless a value has been entered for each and every required fields. For radio buttons and drop-down lists, that means users will have to explicitly select an option between the ones provided. The decision to make a field required is not to be made lightly, because that could frustrate the user and affect the form’s conversion rate.

The meaning of optional is more subtle as it is different for text input fields (text boxes, multi-line text areas) on the one hand, and radio buttons and drop-down lists on the other hand. That’s because in the latter case users only have a limited set of options to choose from, and the first option in the list is always selected by default.
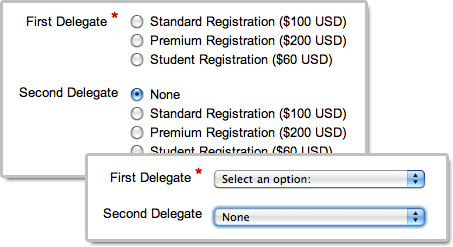
In the example illustrated below, we’re building a registration form for an event. The form should accommodate up to two delegates. The first delegate is required, but the second one is optional. It turns out that:
- The first set of radio buttons or drop-down list should be required.
- The second set of radio buttons or drop-down list should be optional, with None as the default option.

Because None is selected by default, the form user won’t have to do anything in the most likely scenario where he’s only registering one attendee. This will save him time and frustration, and will statistically increase the form conversion rate and reduce form abandonment.
Posted on Apr 12th, 2011 in form builder.
4 Comments
Tags: form conversion, form design, HTML form, input field