Archive for the ‘event registration’ Category
Introducing the Event Check-In App for iOS
Event check-in has always been one of those deceptively simple tasks that turns surprisingly stressful in practice. Guests arrive in clusters, not one by one. A few can’t find their confirmation email. And somewhere in the background, the event organizer is wondering who actually showed up.
We built the FormSmarts Event Check-In App to address all of this — without adding complexity. If you already use FormSmarts registration forms to collect event sign-ups, the app connects directly to your existing forms and data without any duplication or extra configuration.

A Seamless Check-In Experience
The core of the app is a QR code scanner that opens the moment you launch it. When a guest presents their confirmation email, the operator scans the QR code — and that’s it. The registration is instantly retrieved, verified, and the guest is checked in. A clear visual confirmation and an audio cue let the operator know right away, without having to read the screen carefully. Both can be adjusted in the app’s settings.
No QR code? No problem. If a guest can’t show the QR code because they are offline, the app can use the camera to read the registration’s reference number directly — a practical fallback that keeps the line moving. And for team leaders with the appropriate permissions (more on that below), the app also supports looking up a registration by email address or phone number directly from the Search tab.
The app also lets you view full registration details for any guest — all the fields they filled in at registration time — which can be useful for operators who need to verify information at the door.
Team Roles and Sub-User Accounts
For security reasons, the Event Check-In App is designed to work with sub-user accounts, not the main FormSmarts admin account. Before your event, you create a dedicated user for each member of your check-in team, share the relevant registration form(s) with them, and assign the appropriate permissions. The app supports events with multiple registration forms.
The Check-In App documentation defines two distinct roles, each with different permission requirements:
Check-In Operator — The standard role for staff checking in participants at the door. Operators only need View permission on the registration form. They can scan QR codes and reference numbers to check guests in. They cannot search by email or phone number, or view individual registrations.
Check-In Leader — The senior check-in role, typically held by one or a small number of experienced team members. Leaders need View on all registration forms as well as Access permission to Reports & Search. In addition to everything operators can do, leaders can view individual registrations and look up guests by email address or phone number — essential for guests who arrive without any form of confirmation. The Edit permission is also required if you want to allow staff to cancel a check-in if needed.
For the full details on setting up permissions, see the Permissions section of the app documentation.
Integrated Event Management
The Check-In App doesn’t operate in isolation. It’s one part of a set of FormSmarts tools that together give event organizers a complete picture of their event — before, during, and after.
Tracking Check-Ins in Real Time with Data Search
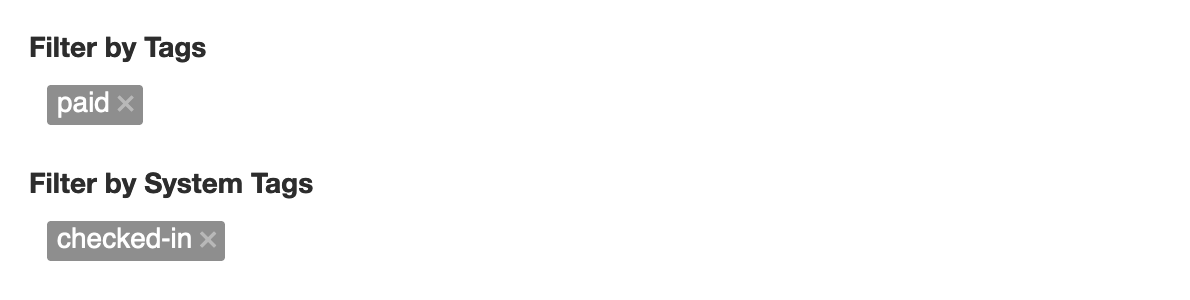
When a guest is checked in, FormSmarts automatically applies a checked-in system tag to their registration. System tags are applied automatically by FormSmarts and are distinct from the user-defined tags you can also apply manually.
This makes it straightforward to monitor the event as it unfolds. On FormSmarts Data Search, you can filter registrations by the checked-in system tag to see who has arrived, or use not:checked-in to identify who hasn’t checked in yet. The same search functionality is available directly in the Check-In App’s Search tab, where team leaders can look up individual registrations by email or phone number and check guests in on the spot.
As noted above, access to the Search function — both in the app and on the FormSmarts website — requires specific permissions. Refer to the permissions documentation for the full details on what’s needed and how to configure it for your team.
Post-Event Attendance Reports with the Report Generator
Once your event is over, the Report Generator lets you export your registration data to Excel in a format tailored to your needs. You can filter the report by system tag to produce exactly the list you need:
- Use the
checked-insystem tag to generate a list of registrants who attended the event - Use the
not:checked-intag to identify registrants who registered but did not show up
You can also customize which fields appear as columns in the report, so the spreadsheet you download contains exactly the registration information relevant to your post-event follow-up — nothing more, nothing less.
A Few Practical Considerations
Configure forms before each event. By default, the app works with all forms the logged-in user has access to. If a team member has permissions on forms for multiple events — or on both a registration form and an unrelated form — the app will accept QR codes for all of them. To avoid any ambiguity, open the app’s Settings before the event and select only the registration form (or forms) for that specific event. This is the one setting you should review before every event.
Protect attendee data. Team leaders with search access can view full registration data, which is likely to include personally identifiable information. The app’s authentication token is valid for two weeks. To prevent unauthorized access if a device is lost or left unattended, it’s worth encouraging leaders to enable Face ID for the app: press and hold the app icon on the home screen and tap Require Face ID. You should also suspend sub-user accounts promptly when team members no longer need access, via the User Management section of your account.
Getting Started
The FormSmarts Check-In App is available on the App Store and works with existing FormSmarts registration forms. Setting up your team is a matter of creating sub-user accounts, assigning the right permissions, and sharing the relevant forms — all from your FormSmarts account. Full instructions are on the Check-In App page.
If you’re not yet using FormSmarts for event registration, a good place to start is the registration form demo, which walks through the key features of the form builder in an event context.
We’d love to hear how the app works for your events — use the comment section to share your thoughts.
Posted on May 15th, 2026 in event registration.
Post a Comment
Enhancing Your Reporting Experience: New Features in the Report Generator
We’re excited to announce two additions to our Report Generator, designed to empower our users to create custom Excel reports according to their unique needs.
Choose the Fields (Columns) Shown in Excel Reports

Our Excel reports now offer even more flexibility by allowing you to customize the displayed fields/columns. By default, reports include essential information like form fields, submission reference numbers, submission links, submission timestamps, payment details (for payment forms), and contextual information passed during submission.
However, we understand that your reporting needs may vary. That’s why we’ve introduced the ability to create tailored reports, that include only the specific fields relevant to your analysis. Simply navigate to the Fields section in the Settings and check/uncheck the desired fields and metadata items to include/exclude them in your report. It’s that simple!
Filter Form Responses by Tags
We’ve taken customization a step further by introducing the option to filter form responses based on tags. If you’ve assigned tags to form responses or if our system has automatically tagged submissions, you can now generate reports that exclusively include submissions matching specific tag criteria.
For instance, imagine creating a report highlighting all event attendees who not only registered but also checked in. This can be achieved by filtering submissions with the “checked-in” system tag, added when the event organizer scans QR codes from FormSmarts confirmation emails or PDF receipts.
These new features are designed to enhance your reporting experience, providing you with better control over the information presented in your Excel reports. We believe that by offering these customization options, we’re empowering you to extract precisely the insights you need.
We’d love to hear your thoughts—share your feedback with us!
Posted on Nov 15th, 2023 in event registration, form builder.
Post a Comment
Tags: excel, form results, form to excel, report generator
How to Offer an Early Bird Discount on a Registration Form
FormSmarts allows you to schedule when to end early bird pricing on your event registration forms.
What Is Early Bird Pricing?
An early bird package is a registration package offering a discount, usually available the moment registration opens until an expiration date you’ve specified. These discounts will often range between 10-20% off the standard pricing and offer registrants significant savings. End dates for early bird rates vary from event to event but commonly end between 2 and 3 months before the time of the event.
 registration package offering a discount on an event registration form")
Adding an Early Bird Registration Package
In this example, we create an event registration form with two registration packages (shown above). The early bird package is available from the moment registration opens until June 1. The standard package (full tuition) is available after early bird pricing ends at midnight on June 2.
- Log in to the form builder and create a registration form
- In the Fields tab of the form builder, add radio buttons or a drop-down list to the registration form
- Enter the pricing rules formatted as shown below
- Click Add Field

Edit the field you’ve just added. Click the button showing a clock face to schedule when each registration package should be available for purchase (enabled) or not (disabled).

Scheduling When the Early Bird Discount Expires
We schedule the early bird package to be disabled on June 2 at midnight.
- Select the Early Bird Field Option
- Set the action to Disable
- Choose Schedule to set the date and time when the early bird discount expires
- Pick a date and time, including timezone (the timezone of your account should be selected by default)
- Click Schedule

We also schedule the standard (full tuition) package to be disabled immediately (As soon as possible option) and enabled at midnight on June 2.
Note how the Scheduled Actions section now lists two scheduled events: the end of early bird pricing and the start of standard pricing.

Advanced Early Bird Pricing Strategies & More
In addition to common event registration forms that offer one or a few pricing options, FormSmarts allows you to make event registration forms with multiple fees. Each fee can have a price that changes at specific dates, as presented above. You could for example offer a limited number of registrations at a heavily discounted rate, followed by early bird registrations, then standard registrations.
Customers may also want disable/enable field options at a specific date and time for other reasons. For example, to disable a choice that is time-limited or no longer available.
We could also use this feature to create an application form that a user must submit within a specific 5-day window, but can start to fill out the preceding week.
Posted on May 2nd, 2023 in event registration.
Post a Comment
Tags: form builder, payment, payment integration, paypal, paypal form
Why You Should Add a Calendar Invite to Registration Confirmation Emails
A calendar invitation is a type of email attachment that allows the person to easily add an event to their calendar, often by just accepting a prompt on their phone.
When you create an event registration form, you should always customize the confirmation email and set up a calendar invitation with the details of your event.
Calendar invites are supported by most mail and calendar apps. They typically provide a seamless experience, allowing users to import the calendar entry with your event details by simply accepting a prompt on their phone or computer.
Adding a calendar entry helps people organize their time and save the date of your event. And of course, reminds them to attend!
Calendar invitations are supported by Microsoft Outlook, Apple Mail and Calendar on iOS and Mac OS, and the Gmail and Google Calendar apps on Android, iOS and on the web.
Feel free to try this demo and add the test event to your calendar.
Setting Up a Calendar Invitation for an Event
FormSmarts supports calendar invitations with the confirmation emails associated with all types of forms: the registration and payment confirmation emails we send on payment forms, standard auto-responder emails, and the opt-in confirmation emails users can request on the summary page of a form.

To add a calendar invite to an event registration confirmation email:
- Sign in to the form builder and find the registration form for the event
- Click the button showing a pencil to edit it
- In the Submit Actions tab, click or tap into the Confirmation Email Text box
- Edit the confirmation email text as needed
- Click the button showing a calendar (outlined with a red circle on the image above) to set up an event calendar invitation
Edit Event Information
FormSmarts needs some information about your event to create the calendar invite:
- The event title, which is pre-filled with the form’s title
- The event start date, time, and timezone
- The event location (or URL for an online event)
- The event organizer email. Note that the organizer email is shared in the invite, so use the public email address of the your organization if you have privacy concerns.
- Finally, the organizer name and the event end date and time are optional.

Keep Event Details Up-to-Date
Calendar invites are linked to a specific one-time event, so unlike most form settings, they are not inherited when you make a copy of a form.
Remember to add your event details when you create a new registration form or update them if you use the same form for several events.
Posted on Feb 6th, 2023 in event registration.
Post a Comment
Tags: confirmation email, e-ticket, payment